Peonies (Wide)

Contact Me

Wednesday, December 3, 2014

Affordable Online Shopping

Hi everyone!

I would like to start by saying a huge THANK YOU to all my beautiful readers and your lovely comments on my last post. That was my most popular post yet. Thank you for your sweet comments!!

Since it was Black Friday last week and Cyber Monday this week, I am sure some of you already feel like experts on distinguishing good deals vs. bad deals. LOL! I was introduced to a VERY affordable shop online through a fellow blogger and now I wanted to share it with the rest of you.

I purchased a pretty necklace so far and will be buying more in the future. It's great for jewelry and accessories as well as nail art tools (and lots of other beauty, home related, clothes, etc items!). There is so much more on there so please check it out! If you do, use AURT10 as a discount code to receive 10% off. The website is Born Pretty Store and you can access it from  here and leave me comments about what you think! Here is a photo of my recent purchase:
Have a great rest of the week!


Wednesday, November 12, 2014

Henna pictures

Hi everyone!

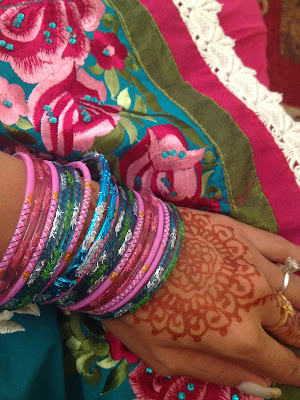
I did henna on my hands twice last month and wanted to show you the patterns. Please feel free to leave comments/opinions on what you think!

The dark photos were taken when the henna was still wet. The end color is usually orangey/brown. The backside of my hand designs look very similar but they are different if you look carefully!


 Thank you for visiting my blog! Have a great rest of the week!

Tuesday, November 11, 2014

Gratitude

Hi everyone!

Thank you so much for the warm and honest words in your comments in my last post. I love getting feedback from my readers! It feels good to know that others are on the same page as me when it comes to friendship.

Today I am writing about gratitude. I got this idea from wanting to express my gratitude to my readers and also because it is Veteran's Day here in the US. I'm not going to preach by saying "count your blessings" or by reminding you that "there are people in worse situations than you" because I admit, that doesn't always help when someone is trying to feel better. It's always easier said than done as some of you may already know. This post is not going to be about how to show gratitude to others; it'll be more about your inner gratitude towards yourself and your own life.

Last week was tough for me emotionally because it was hard to be grateful for what I had in my life. I kept seeing other people's success more than my own. I think the first and best way to deal with those feelings is by letting time calm you down. Sometimes you just need to let your own brain deal with it until it finally gets tired and decides to rest from the topic. Eventually, you forget the problem that was bothering you once because you acquire newer memories and feel more grateful for the new experiences you have.

I hate being competitive but I grew up with a twin and an older sister... all the elders in my family ALWAYS compared us and it is now engraved in my head to always try to do better than others. If you have had similar experiences, try not to let this get in your way and use it as a positive strength just to make yourself better and stop comparing yourself to others. If you set your mind to become better than you were yesterday, you'll notice your focus is more on you than others. With that said, appreciate yourself and more importantly, forgive yourself. If you didn't reach your goal, that's okay. You tried your best and will continue trying until you get there.  If it still isn't working out, try doing something different. This doesn't mean you have to give up. It means that you put your talent towards something where it will be more useful. Doing that will help you get more confidence and peace with your inner self.

Do you have techniques that help you feel better about yourself? Is there a certain way treat yourself and appreciate yourself? Please share ideas if you do!

Be sure to come back and view a couple of more henna photos! Have a great week everyone!


Tuesday, October 7, 2014

Tokyo Milk French Kiss Lotion

It's like dipping your hands in heaven!


Hi everyone!!


Today I am going to write a quick, short review on a product that I have been in love with since last fall. I am not a huge fan of lotions only because some make my hands feel too greasy and then I touch my *sensitive* skin on my face and it's just not that fun. For me to find a lotion that smells good, doesn't react to my skin, and that is moisturizing was not an easy task. I found this lotion through working at the parent company for 2 weeks and tried out almost 100 of their perfumes, soaps, and lotions... it was pretty exciting to just smell their luxurious products everyday for 2 weeks until I got the opportunity to purchase one. I had a few favorites but ended up buying only their Tokyo Milk French Kiss lotion. 

I'll get to the actual product in a bit because I have to say I adorrrre their packaging. Compared to most other lotions and even perfumes, this product looks extremely luxurious and it's just so beautiful!! If you do buy it, you won't want to throw the box away!! The lotion tube and the box both have the Eiffel Tower on them (which I would love to see in real life someday!) and the box also has a very "royal" like interior with the patterns and crown. Okay now let's talk about the product inside... This lotion not only moisturizes my skin enough to make them soft and not greasy, the smell of the lotion is like heaven! It's extremely girly and if you like flowers or exotic smells, you would love this lotion! Another thing I loved about this lotion is that the smell still stays even after washing my hands. I had no idea that the company was this popular at the time but you can find this product at SO many places in the US and at a bunch of websites online. If not this specific lotion, you'll find a different fragrance that you'll love. Most of their products just look so beautiful from the outside, you'd want them right away! Try it out for yourself and leave comments on what you think!!

If you have favorite lotions or perfumes, write them down in the comments! 


Thank you for reading and have a great week! 

Also please keep an eye out, I might be changing my blog name and layout sometime!! I just need to set some time to get myself to do it!! 

*I was not paid to do this review*

Monday, September 15, 2014

Sephora FREE Makeup Classes

Hi everyone!

I apologize for not blogging as often (again). Work has just been getting so crazy. Hopefully this month is easier and I can blog more.

I spent my last 2 Sunday evenings at Sephora learning their secrets and tips on makeup AND trying new products. This is the best thing for beginners because you get to learn these things that took me multiple youtube tutorials to learn. I am not being paid for this review or anything; this is just to share my enthusiasm for what's out there and how useful it can be.

So far I only attended two classes. I wanted to try the highlight and contouring one but before that I went to the Flawless Foundation class. Some of us might think foundation is such a simple thing and that it requires no beauty expert to do but I was shocked to see how you can actually make your face look so flawless without even putting so much on your skin. The class was small so I got my own beauty coach to help me and she found THE PERFECT shade for me. They will test your skin color IQ (I think that's what it's called?) and it'll give you tons and tons of options of different brands and type of coverage to choose from. I saw some girls trying out designer (yes, $60+ foundations are designer to me) but I decided to go with the Sephora brand just so I could buy it later someday if I really liked it. Here's a little secret about this class, you get to obviously do foundation but you ALSO do a little bit of highlighting and contouring!! This might be because the class I went to was small and the one-on-one attention allowed more time for the extra steps but I was really excited about it.

(Sephora's color IQ!)

My second class (which I was really looking forward to) was the highlight and contouring class. This class was bigger and overall I felt like I didn't get the same attention as I did in the first one. This might be because I worked with multiple beauty coaches and didn't really do as much as I did in the first class. This does NOT mean that it wasn't fun or that I didn't learn anything. I think the trick here is to just talk with your beauty coach and let them know what exactly on the face you want to highlight and what you want to "contour" or push back others' attention from. The plus point of working with more than one beauty coach is that you get different feedback from each one. Whether it's how they contour and highlight or their preference over which brushes work better, it's worth your time if you really want to learn from the experts. It's interesting to hear what others think about these products and you get better "reviews" before buying them. Another thing that I loved about these classes was that there is NO pressure for you to buy anything. My first beauty coach even recommended certain brands that you can buy that are affordable and do the trick. I was just really excited that both times I went, I got to use BRAND NEW Sephora brush kits. These are things you normally wouldn't get if you just went for a normal visit so it's definitely worth trying out. The kits are not available for sale but they do sell the brushes individually. I ended up buying different brushes from different stores so I'll be doing a review on them in the near future! One of them was a brand I actually wanted from what I saw online and I REALLY wanted it after my beauty coach recommended I buy it.

So... if you live in a city where Sephora does classes, go ahead and give them a try!! You might try a product you thought you would've never tried otherwise or you might just learn some helpful tips even if you think you already do your makeup perfectly. The best part is that the classes are free!! So is the makeup. If you are unsure of buying the full size product or if you have sensitive skin (like me) you can ask for samples so you can see if the products don't react on your skin. =) It doesn't get better than that!! Leave me comments or questions if you have any.


EDIT: I found out that some YouTube and Instagram celebs do these classes as well (because they work at Sephora)! Yesterday I got to see makeup of one of the celebs!

Thanks for reading and have a great day! 

Friday, August 29, 2014

Benefit Fakeup Concealer Review

Hi everyone!

I am writing a short review on a new product I just tried this week. I never really used concealers before this year because I had never noticed my under eye circles (even though I'm in my early 20s!) but I really wanted to try this concealer and it has given me great results! I have medium-tanned skin so I got the medium shade.

This was a sample size and I'm sure after this runs out I'll go buy the regular sized one. You can get this free sample from Sephora this month if you are a beauty insider by the way! =)

Here is a list of what I liked about this product:

  • It is really to apply and blend. I usually use a make up sponge to blend my "concealers" or "highlighters" if they are in a creamy form but I was able to blend this in just as well with a make up brush. 
  • It gave natural-looking light under my eyes making my face looking bright and awake. I love the coverage!
  • It definitely is hydrating like it says on the package! 
  • This one is just my personal opinion but I LOVE the smell of it! It's not like a perfume or anything but I liked that it smelled like good make up when I applied it to my face.
  • It doesn't look caky or feel heavy on the skin. It's pretty light for every day use.
  • NOT greasy on my skin even though it is a moisturizer as well.

Displaying photo 1.JPG
Displaying photo 2.JPG
Displaying photo 3.JPG

That's about all I can say about it for now since I've only used it a few times. Feel free to ask me questions about it or just comment if you have used it as well! 

Also, thank you for your responses on my previous post!! I love getting to know my readers! 


Tuesday, August 26, 2014

Getting to know you and me!

Hi everyone!

I'm so glad I got some love from my followers on this blog so far. I wish I had more time to commit to writing it daily but I work a full time job and it's just not as easy as I thought it would be to blog on a daily basis. To break the ice, I want to get to know some of my readers and give you guys a chance to get to know me! So you can feel free to comment below asking me questions and leave some interesting facts about yourself. This can be about your pets or favorite nail polish color or ANYTHING you want to share.

And... as usual, have a great rest of the week! This is one of the busiest weeks I've ever had at this job so I might be a little late in replying to you all.

Monday, August 11, 2014

"Emergency" Henna

Hi there ladies!

As some of you already know, I'm Indian and I love henna! I usually make my own henna paste and "cone" at home but this was the first time I bought a cone from an Indian store in the US. I used to bring cones from India back from vacations but I haven't done that lately so I thought hmm why not buy it from here? I am pretty sure though this was NOT Indian henna.

At first when I started applying it I noticed that it was actually hard to squeeze the henna out. It took much longer than usual and it got to the point where my hand had some parts that were dried already and I wasn't even done! The drying process was *super* quick and the "henna" didn't actually rub off like normal. It created its own stringy, lacy layer that I peeled off. My absolute favorite part of this was how quick the color showed up. It was almost black but mostly dark brown (which is never normal right after applying henna) and I was surprised that it took just minutes for a color like that to show up. For those of you who don't know, henna usually turns orange first and then gets darker... especially if you take it off that quick. This made me realize this wasn't pure henna but I went ahead with it since I was at the point where taking it off wasn't possible because it had already stained my hand.

Anyways, a week and a half later, I have some photos of the after effect... I have sensitive skin so this might just be me but my hand had become extremely dry. Lotions helps but for now I'm waiting for all the dry skin to come off so the dye is out!


Here is how my hand looked right after the henna was done. 


This is how they looked yesterday.


Bottom line.... use it at your own risk! For "emergency" henna, it completely makes sense why it is this way because it darkens in minutes and is great for parties or weddings when you don't have time to sit with henna on your hands the night before. For recreational use, I don't think I would use this again soon because of the dryness on my hands.


Have a great Monday! 

Saturday, August 9, 2014

Real Techniques Starter Makeup Brush Set Review (SHORT!)

Hey ladies! 

I have never done a review of any sort so this is the first! I love shopping at Kohl's and a couple of months ago I picked up some makeup brushes called "Real Techniques Starter Makeup Brush Set" I hadn't tried them and finally this weekend when I had some extra time, I gave them a try and I must say they are A LOT better than everything else I have used! These were super soft and a pleasure to use on my eyes. Most of the other brushes I have tend to hurt my lids a little because I press on them too hard but these brushes were super light on my eyes. 

I loveeeee the color of the brushes and absolutely love that they come in their own little case so they can stay organized and tidy! Check out these brushes if you want something "beginner" like and something that's extremely soft on your lids. Btw, these are also available at Ulta!

Here are some of its features:
  • Base shadow brush
  • Deluxe crease brush
  • Accent brush
  • Pixel-point eyeliner brush
  • Brow brush
  • Panoramic brush case is a 2-in-1 case + stand

This picture is from their website!! I haven't checked out the designer's YouTube yet but will do so just to get some tips from them! 


Ask me more questions about these brushes! I've only used them once so far so maybe I'll do a tutorial using these! =) Until next time, have a great weekend everyone! 


Monday, July 28, 2014

Monday Motivation

Hello to my beautiful followers/readers!

As my new week starts with an early morning and plan for longer work day, I thought I'd look up some motivational photos to start my day. Here's something for Monday! Positivity to start a Monday as if it's just another chance to be AMAZING!!


PS. I am on Bloglovin so follow me there too!


Have a great week everyone!!


Wednesday, June 11, 2014

Simple Recipe - Mattar Tofu (Peas and Tofu)

Hi everyone!!


I haven't posted a recipe lately but I have tried some out!! I've been busy learning to sew dresses and trying to improve my cooking skills. Today I have a recipe to share for those of you who may be vegan (I'm not but I still love this recipe!) which includes peas and tofu in a tomato based gravy. Let me know how it works for you!! If you are familiar with "mattar paneer" then you'll notice this is just a vegan version of it. This recipe is for those of you who want to try vegan, soy-free, or gluten free dishes. You can either make it vegan (by using tofu) OR soy-free (by using paneer) but not both at the same time.

Ingredients (not in specific increments because it varies on how you want it):

Tofu - I used one whole block
Peas - I used about 1.5 cups
Tomato - I think I could have used less but I used a very small can of tomato sauce with some chillies in it already
Green Thai Pepper (or any other pepper) - according to taste
Red chili powder - optional unless you want it a bit more spicy
Salt - according to taste
Cumin seeds
Ginger - about half inch piece, chopped
Garlic - 1 clove, minced/chopped
Butter Chicken Masala - available at Indian stores, this is optional! And don't worry, it IS vegetarian.
Garam Masala - you can use ground cumin seeds, cilantro/corainder seeds, and black pepper mixed
Cilantro/Corainder - for garnishing at the end, chopped

To make this recipe I started by grilling my tofu. You can buy firm or extra firm so it works better. This will take a while because your tofu has to be cut in cubes and grilled from all 6 sides. I did it to make the tofu harder like paneer (Indian cheese) like the original Indian recipe uses.

Next, in a pan, you want to start cooking your garlic and ginger with some cumin seeds.Try not to burn them! As soon as they were done I added in my peas and tomato sauce. Then I added some red chili powder and one thai chili pepper to the gravy. While I completed this step my tofu was hardened from all 6 sides and I added the tofu in. I had to add more water to give it more "volume" and let the dish simmer on the stove for about 10-15 minutes.

My last step was adding the garam masala, butter chicken masala (optional), and cilantro.


This is really easy and quick. If you are not vegan and like cheese then you can go ahead and buy paneer instead of tofu and it'll taste similar. I want to say it's gluten free as well because it doesn't use any wheat-related ingredient. To try soy-free, you can definitely use paneer instead of tofu.


I ended up eating it as soon as it was done so I don't have too many pictures!! Enjoy and leave comments on your thoughts about this recipe!


Thanks for your visit!! See you guys again soon!

Thursday, May 1, 2014

Indian dress (Punjabi Suit)

Hi everyone!

I wanted to share some pics of my new Indian dress with you all. This is a traditional Punjabi (North Indian) dress. The official name is a "Salwar-Kameez" or just simply a Punjabi suit. Please leave comments! The dress and bangles are both from the internet so I can give you the links. The outfit was custom stitched and bangles were custom colored. =) The kameez is the top, salwar is the bottom, and the chunni (or dupatta, whatever dialect you want to use) is the veil! The veil can be worn in different ways. I just wore it over one shoulder for the pictures. Enjoy!

Here are the pictures in a bigger size:


Front
Back

Custom-matched Bangles


See you guys next time!

Tuesday, April 29, 2014

Funny Airport Story

Hi everyone! 

I have a short funny story to share with you all. It's more of a learning lesson but we tend to make mistakes while traveling and being in a rush so I thought it's worth sharing.

This starts when I was returning from studying abroad. My host city didn't have an international airport so I had to take a train to the city with the international airport. My train ride was early in the morning and I didn't really have time to have breakfast since I had stayed up all night packing (and being all emotional). In the morning, I took out all my bread and cheese and my last banana that I had left from the refrigerator and left the dorms. I ended up eating most of my bread and cheese on the train and put my banana in my coat pocket. While being all emotional again, I forgot to eat my banana and boarded the flight after some luggage size arguments with the airport staff. All that almost made me miss my flight so I had completely forgotten I still had a banana.
When I had finally returned to the US and was waiting for my suitcases, a customs dog came and sniffed everyone's purses and backpacks. I held my coat and let the dog sniff everything assuming I had nothing to hide and the dog started acting strange while sniffing my stuff. Being scared, I told the customs lady I had European chocolate and some cheese but nothing else. I didn't even remember my banana in my coat pocket!! She searched everything I had and finally found the banana. I just stood there being embarrassed while everyone in that section of the airport just stared at me. It was truly embarrassing because I was getting the wrong type of attention. We all know how bad it can be if you're the center of attention at an airport! I had to go through a separate line from all the other passengers and had to hand my banana to an officer. They took it out of my hands with gloves on and put it in a dangerous looking bucket with "Hazards" written over it. 

So my learning lesson was to not forget what you're carrying while traveling and make sure you have no fruits or veggies with you. If you do, you'll end up paying a hefty fine unless you can prove to the officers that you truly forgot and were meant to eat it before boarding your flight! 

Tuesday, April 8, 2014

A smoothie a day


A lot of us have been taught about the food pyramid and some of us have tried to follow it. Although health researchers have updated the food pyramid, it's still hard to get the portions of everything that is recommended for us. Personally, I have a hard time following it with my fruit portions. Unless I have somebody cut the fruits and make a fancy fruit salad for me (like my mommy used to), I won't even remember to have any fruit in my daily diet. Now I'm going to share a yummy smoothie recipe that you can probably have every day without getting bored of it. I won't share the exact amount so fruits to add because I have different preferences and I normally don't measure everything but you can mix it up and add whatever you like and however much of it! Plus, you don't have to add everything listed in the same time!

  • Strawberries - known as a must have in any smoothie
  • Blueberries - healthy even in small amounts
  • Banana - usually I would have half a banana to get that taste in
  • Blackberries - I recently started adding these in because my fruit pack comes with it
  • Kale or Spinach - I don't always add this but most of the time you can't taste it so it's a good way to get it in your system without having to cook it
  • Cantaloupe - this wasn't my idea but it definitely gives your smoothie a sweet taste that can hide any other bitter ingredients you might be adding
  • Grapes - sometimes add a color or sweetness depending on the type of grape 
  • Pear - my rare smoothie ingredient but I love pears a lot to sometimes eat them raw so it works
  • Raspberries - not my favorite but I know others like this ingredient a lot
  •  Water, milk or yogurt for the blending

Add comments if you have additional ideas for a smoothie that tastes normal and is healthy. I like a smoothie that doesn't have too much of a certain fruit that hides the rest of the flavors so please share your ideas! 

Thursday, April 3, 2014

First stop... LONDON, ENGLAND

Hi Everyone! 

This blog will be about traveling and food... and maybe other things that I like. I'm not sure where it'll go from here or how often I'll post but I plan on picking random locations I want to visit and different food that I love! 


The first location of this blog is LONDON, England. It's actually one of the places I've been to but I still need to see a lot more there! There will always be a lot to see in a big city like that for all tourists and the people who live there.


CALLING ALL LONDON LOVERS!!!!!!!!!!!!!!!!! 
Let's start off with my #1 favorite thing in London that drove me CRAAAAZY the first time I saw it. It's exciting to see it with your own eyes after seeing it on TV or movies for all those years. 


Yes, it really IS that gorgeous! Picture taken by me during my ride on the London Eye.


Big Ben... Something a lot of people don't know (and at once I didn't know this either) is that BIG BEN is not the tower itself. It's actually the bell of the clock! The clock tower, which is now called the Elizabeth Tower, stands at the end of the Palace of Westminster. 
I remember my first time seeing it. I couldn't even take my eyes off of it! I started taking pictures of it while waiting to cross the street to get closer. The clock's light in the nighttime is beautiful! After taking those 20 or so photos you can start walking further and you'll see the Westminster Bridge and the LONDON EYE! The big ferris wheel all London lovers dream of going on!

Going on the London Eye will cost you around £18. You might hear from others that it's not worth it but you gotta go on it at least once as a London lover. The one thing I wish I could do is get the whole capsule to myself someday when I go on it again. Some people actually get married on the London Eye! Not sure how because the ride is between 20-30 minutes. It's probably a short wedding or they book it for longer. Okay getting off topic... so yes the London Eye. They'll let you experience a 4D movie about London and specifically the London Eye once you buy those tickets. Make sure you don't forget to watch it (because I almost did!) 

Here's a picture I took when my capsule and the capsule next to me were at the top of the London Eye: 

Okay so next I'm going to focus on the TUBE and red gorgeous buses. The subway system that all tourists loooove about London because it makes traveling so much easier. One tip for all tourists is PLEASE GET A DAY PASS for each day you're there because you will be going around to a lot of places and trust me, it's not worth it to buy an oyster card that you have to add more money on each time. The travel card will work for unlimited times each day. So some of the pros and cons of the Tube and buses I'd say are:

Pros: 


  • Short waiting time. The longest I had to wait for a train was a little over 5 mins. Most of them come within a few minutes! Buses do have a longer waiting time but it's not too bad.
  • They go all around the city! You can get anywhere and everywhere in London with a bus and/or tube.
  • Tubes are super fast. Woohoo!
  • They are connected with major airports and train stations that go to other cities. Too bad the US doesn't have that. If I wanted to go to LA or NY I can't just go on a train that will take me there. 

Cons:


  • They are really packed in Central London during peak times. I can't blame them since London is such a famous big city that tourists visit all year long. You really can't avoid the packed trains in Central! 
Photo above taken by me right by the Picadilly Circus!

So on the tube, we get to the Picadilly Circus. This place is packed and I mean PACKED with tourists. I guess this place is to London what Times Square is to NYC. I always wonder how they shoot movies here with no tourists. I'd be super angry if I was spending a day in London and I had to wait for the filming to be over to get my own pictures done at the touristy spot. I can't complain too much about the tourists and others who go there because you will get to see people from all over the world in one city... from honeymoon couples to students who came for a short weekend (like me the first couple of times I went to London). Aaah London... it's always full of exciting people!!!! 

PICTURE TIME!!!!!!
If you're going on the London Eye and getting photos by the Picadilly Circus, you sure won't want to miss the first Madame Tassauds. If you like celebrities and want to see how they are in real life without seeing the REAL them , you MUST go there. (Some people still believe that I saw the Queen because I have a picture next to her! So if someone wants to believe that, let them!) 


Our next stop in my London topic blog is my favorite bridge in the world: TOWER BRIDGE. Now let's get this right... it's the TOWER Bridge, NOT THE LONDON BRIDGE! I like the London Bridge as well but you can't get confused and call the Tower Bridge the London Bridge and give it credit for being something it's not. The London Bridge is a whole different bridge! They are very close to each other but please don't get them confused. The Tower Bridge's lights at night make it visible from all areas near River Thames. I just can't believe someone could make a bridge this beautiful! I used to have different pictures of it as my desktop background and seeing it sure felt like a dream come true! Here is the Tower Bridge: 
 A little further from this is the London Bridge. It's an amazing experience to walk both bridges!


Next we'll take a little trip to FAMOUS PEOPLE land known as Madame Tassuads. I won't be posting those pictures on here because most of them have me in them but I'd like to share some things that you do not want to miss while you're there. With the crowd taking photos with all their favorite celebrities, don't miss out on any by rushing to avoid the crowds. You'll be surprised they have almost all notable people in that building. Next, the "taxi ride" of Madame Tassuads... They don't allow you to take photos during that ride but I like that idea because you'd rather pay attention to the ride that goes through the history of the UK and see the wax figures moving with the music. The last thing at Madame Tassuads that is a great experience is the 4D movie. The one and only problem about going to a tourist attraction that lots of people want to get the right poses and pictures at is that THERE ARE A LOT OF PEOPLE! The only thing you can do is go early in the day and still have to be patient... I must say it is worth the time though! 

When you're in London town, you really cannot forget the Queen. Okay, I admit you won't meet the Queen unless you're a celebrity but you'll get to see 100 other tourists and the Queen's guards WHO NEVER LAUGH at work! If the flag is raised that means the Queen is inside. My favorite part about going to the Buckingham Palace (which is where the Queen works!) was the walk from Marble Arch towards the Palace that's surrounded by a beautiful park with birds and a lot of British flags. When I say a lot, I mean A LOT. You'll definitely get the feel of being in the UK.

 Then the Palace of course...


Seeing the length of this first post, I'd like to keep this next part short. Here is a short list of some other places that are on the "Must-See" list of your visit to London for you London lovers!


  • St. Paul's Cathedral - the architecture and the traditional ceremonies!
  • Milenium Bridge
  • Twinings Tea Shop - get that English tea before you leave!
  • Shakespeare's Globe
  • Wembley Stadium for you soccer fans
  • Platform 9 and 3/4 at Kings Cross Station
  • Museum of London - they got a little bit of everything for everyone's taste!
  • the street that was filmed as Diagon Alley in Harry Potter (I couldn't find this because I ran out of time but if you do, please share photos!)
  • Hyde Park - London's famous park 
  • Oxford Circus - especially Oxford Street for all you shopaholics! You can go shopping in stores like TopShop or get the smaller souvenirs from the side shops on the street.
  •  Trafalgar Square - see from art galleries to street performers. This place is something you see in a lot of movies!

    • Somerset House 
    • Canary Wharf - Big buildings!
    • The Shard - get a view of London from Europe's tallest building (from my sources, let me know if it's not the tallest anymore!)
    • M&M world 
    •  
       Add comments if you have additional places to recommend! You'll notice you would never get bored in the world's 2nd most visited city (and believe it or not, the 1st one isn't NYC! NYC is #5 as of 2013 and it would be since it is far from the Eastern part of the world - not trying to downgrade NYC here but the focus of this post is on London!). 
       
      Source for that last "fact" I just added up there: http://www.forbes.com/pictures/ehlk45iehm/2-london/